

Target crop
Plants should continue to exhibit uniform growth following delivery from the propagator.
Target root zone
A successful start for the plant is determined by good root development which should remain confined to the block. Attention should be given to developing as many pin roots as possible to enable fast rooting in as soon as slab contact is required.
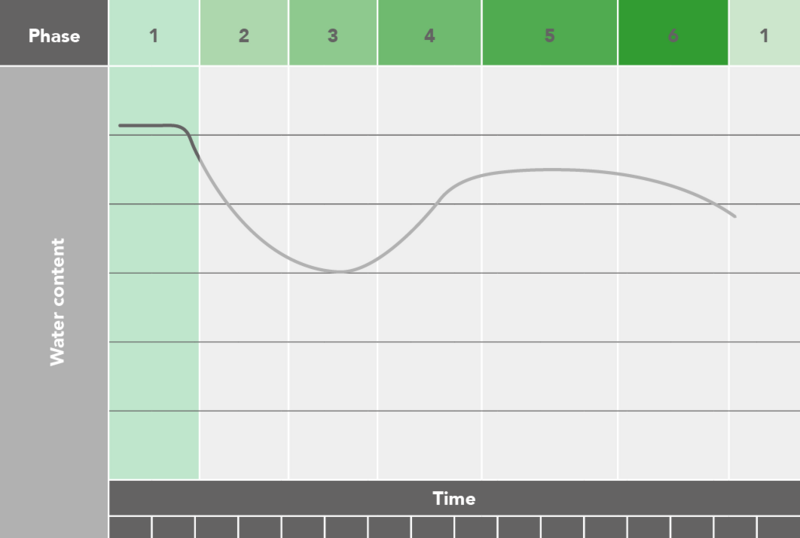
Start of phase
Plants arrive into greenhouse
End of phase
Rooting in
Objective phase
Continue the uniform development of a strong generative plant with good formation of the first and second clusters.
Target crop
Uniform growth should continue and the leaf area should increase to enable the plant to intercept as much radiation as possible. Truss development should remain strong and generative with good flower and pollen formation.
Target root zone
The pin roots should grow easily out of the block and uniformly into the substrate. It is important to supply enough water and nutrition to the blocks until the plant can rely on the available water in the slab.

Start of phase
Rooting in
End of phase
Roots have penetrated substrate by several centimeters
Objective phase
Fast and uniform rooting in, so that the roots are penetrating the growing media in line with the plant size.
Standing plants on the side of the plant hole focuses strength into the first and second clusters and keeps the correct generative balance in the crop. Just like in propagation, each irrigation you provide will result in a vegetative plant reaction. Therefore while the plants are stood beside the plant hole limit the number of irrigation sessions by steering on block WC%. It is best to let the block dry down to 40 - 45% before re-saturating it back to 80% (see reference table). Here you will realize the benefit of the slow uniform dry down from the Plantop blocks giving you the extra possibilities in generative steering.
If you have a GroSens system installed placing the sensor in the propagation block during this phase can aid your decision making on when to irrigate. To position the sensor first remove the stainless steel plate and insert the pins into the block. Watch the video below on how to do this correctly.

We are often asked when is the right time to transfer the block onto the slab? The simple answer is when the irrigation frequency (vegetative action) is leading and you are no longer ‘steering’ the plant! Of course this will be dependent on block size and the number of heads per block. Larger blocks 10 x 15 cm with one plant (2 heads) will offer longer generative control possibilities compared to 10 x 10 cm with two plants (4 heads).
You have two options for cutting the drain holes
Option 1
Pre-draining the slab by puncturing the plastic wrapper with a small hole just above the seam will create a small reservoir of water at a uniform height in each slab throughout the greenhouse. This layer of water ensures that the propagation block will remain sufficiently & uniformly wet so in the first 48 hrs after planting (even if you have previously stood the plants beside the plant hole) only 1 or at most 2 irrigation sessions will be required to stimulate root penetration into the slab (applies to Plantop only). Watch the video below on how to do this correctly.

Stop irrigating from the moment the plant is rooted 2 - 3 cm into the underlying slab & until the final drainage hole is cut which will be after 4 - 7 days. Ideally the final drain hole should be made by cutting along the length of the plastic seam with scissors or by cutting one hole on the side of the slab at its lowest point.
You will find it easier to cut the drain hole while there is still excess water in the bottom of the slab pushing the side-walls of the plastic foil outwards.
Option 2
If you wish to cut the drain holes directly first drain excess water from the slab by making a small puncture just below the seam. Return to the slab once it is drained. Ideally the final drain hole should be made by cutting along the length of the plastic seam with scissors or by cutting one hole on the side of the slab at its lowest point. Watch the video below on how to do this correctly.

If you’ve have been or are still steering beside the plant hole, when is it time to plant? The answer is simple when the rapidly drying block due to increasing plant size leading the irrigation strategy and you are no longer control. Remember every irrigation results in a vegetative plant reaction. Keep this general rule in mind. If irrigation is given too frequently >5 sessions or >400 ml per day (10 X 10 cm) - 400 - 500 ml per day (10 X 15 cm) the vegetative effect of irrigation will be leading crop development.
Other factors to consider are stage of flowering i.e. 2nd cluster flowering? The variation in measured WC% between blocks measured by GroSens (Sdev> 8) and finally the quantity of roots at the bottom of the block. If the root mass is too large it will hinder rooting in. During phase 1a when the blocks were next to the planting hole and during the rooting in phase (1b), the GroSens Sensor can be placed in the plant block. Watch the video below on how to do this correctly.

An unequal WC% between the propagation blocks should be ‘levelled’ before planting by giving a few small (50 - 150 ml) irrigations until the blocks begin to drain. The pool of water on the slab in which the block is standing will ensure (almost) complete re- saturation of the block. Give one to a two irrigations shortly after planting. This will ensure good contact between the block and the slab.
You have two options for cutting the drain holes
Option 1
Pre-draining the slab by puncturing the plastic wrapper with a small hole just above the seam will create a small reservoir of water at a uniform height in each slab throughout the greenhouse. This layer of water ensures that the propagation block will remain sufficiently and uniformly wet so in the first 48 hrs after planting (even if you have previously stood the plants beside the plant hole) only 1 or at most 2 irrigation sessions will be required to stimulate root penetration into the slab (applies to Plantop blocks only). Watch the video below on how to do this correctly.

This way of cutting the drain holes is the preferred choice for 10 cm high slabs.
Stop irrigating from the moment the plant is rooted 2 - 3 cm into the underlying slab and until the final drain hole is cut, which will be after 4 - 7 days. Ideally the final drain hole can be made by cutting along the width of the plastic seam with scissors or by cutting one hole on the side of the slab at its lowest point.
It will find it easier to cut the drain hole while there is still excess water in the bottom of the slab effectively pushing on the side-walls of the plastic foil.
Option 2
If you wish to cut the drain holes directly, first drain the excess water from the slab by making a small puncture just below the plastic seam. Return to the slab once it is drained and cut one drain hole per slab, at the end of the slab or ideally by cutting along the seam across the width of the slab. Watch the video below on how to do this correctly.

| Bright day - Vegetative steering | Dark day - Generative steering | ||||||
| Start time | +2.0 hrs after sunrise. If using block weight <300g 10 x 10 cm <350g 10 x 15 cm | +3.0 hrs after sunrise. If using block weight <270g 10 x 10 cm <300g 10 x 15 cm | |||||
| Stop time | -2.0 hrs before sunset | -3.0 - 4.0 hrs before sunset | |||||
| Target day level WC | Delay irrigation until block WC 40 - 45% | Delay irrigation until block WC 40 - 45% | |||||
| Target decrease WC overnight | Maximum 20% | Maximum 20% | |||||
| Moment 1st drain | Not applicable | Not applicable | |||||
| EC drip | 3.5 - 4.0 mS/cm | 3.5 - 4.5 mS/cm | |||||
| EC block | 5.0 - 8.0 mS/cm | 5.0 - 11.0 mS/cm | |||||
| 24 hr drain | 10 - 40% | 0 - 20% | |||||
| Irrigation volume | 2 - 4 irrigations 75 - 100 ml per 10 x 10 cm 100 - 150 ml per 10 x 15 cm | 1 - 2 irrigations 100 - 200 ml per 10 x 10 cm 150 - 250 ml per 10 x 15 cm | |||||
| ml/joule | Not applicable | Not applicable | |||||
| Night irrigation | Block WC% decrease >20% | Block WC% decrease >20% | |||||
In propagation the Plantop block was typically irrigated when the block WC% Reached 40%. The ebb-flood system raising it easily back to 80%. Between the irrigation moments the EC typically rising from 4.0 to 11.0 mS/cm. This prcoess of controlled irrigaiton facilitated maximum generative plant development. This same approach should continue whilst the plants are stood beside the plant hole. For guidance on when to irrigate you can use the GroSens system. Simply remove the metal plate and insert the GroSens sensor into the block. Optimising the irrigation strategy at this stage will encourage more ‘pin roots’ to develop within the block. It will also ensure the plants continue to grow in a controlled, uniform way thus Stimulating the development of strong flowers. Remember having a uniform and Slow decrease in WC% between irrigation sessions whilst standing the plant besides the plant hole allows you to lower the frequency of irrigation, thereby increasing your ability to steer the crop in a generative direction.
| Bright day - Vegetative steering | Dark day - Generative steering | ||||||
| Start time | +2.0 hrs after sunrise | +3.0 hrs after sunrise | |||||
| Stop time | -2.0 - 3.0 hrs before sunset | -3.0 - 4.0 hrs before sunset | |||||
| Target day level WC | Slab >75% Top >60% Block >50% | Slab >75% Top >60% Block >50% | |||||
| Target decrease WC overnight | Not applicable | Not applicable | |||||
| Moment 1st drain | Not applicable | Not applicable | |||||
| EC drip | 3.5 - 4.0 mS/cm | 3.5 - 4.0 mS/cm | |||||
| EC slab | Block: 5.0 - 8.0 mS/cm Slab: 3.0 - 3.5 mS/cm | Block: 5.0 - 11.0 mS/cm Slab: 3.0 - 3.5 mS/cm | |||||
| 24 hr drain | Not applicable | Not applicable | |||||
| Irrigation volume | 200 - 250 ml/m² | 250 - 400 ml/m² | |||||
| ml/joule | Not applicable | Not applicable | |||||
| Night irrigation | If used in line with techniques of ‘the new way of growing’ (HNT). These should cease by second flowering cluster | If used in line with techniques of ‘the new way of growing’ (HNT). These should cease by second flowering cluster | |||||
Before planting, it is essential to fully saturate all the slabs with nutrient solution for at least 24 hours before the drain hole is cut. This ensures that even the fine pore spaces between the NG2.0 fibres are filled with water. There are two ways to cut the drain hole. Watch the video below on how to do this correctly. For Prestige 10 cm high slabs the preferred method is by first pre- draining the slab. Prestige 10 cm is designed to promote generative plant development providing maximum synergy between root zone and climate strategies. In order to facilitate maximum generative - vegetative steering of WC% and EC in the root zone throughout the duration of the cultivation you are advised to cut one drain hole per slab. Remember with Prestige 10 cm it is perfectly safe to recycle the drain water from the moment the drain holes are cut. This will help reduce unwanted emission of fertilizer to the environment.
Target crop
Work on plant development and increasing the leaf area to capture the available radiation and keep the required vegetative – generative balance in the plant relative to the fruit load and light levels.
Target root zone
Establish complete root penetration in the entire volume of the growing media. This will enable the plant to take up all the water and nutrition it will need for maximum summer production and quality.
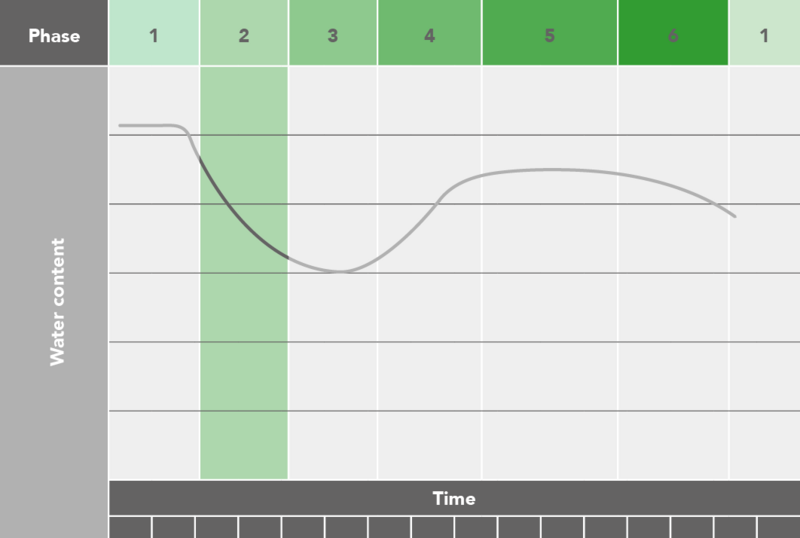
Start of phase
Roots have penetrated substrate by several centimeters
End of phase
4th truss is flowering
Objective phase
Continuation of uniform and controlled plant development and the realisation of a root system that fills the entire volume of the growing media.
The crop is now rooted into the slab so ensure your GroSens sensor is positioned in the slab correctly. Watch the video below on how to do this correctly.
Moving forwards, until cluster 7 or 8 is flowering the required minimum decrease in WC% overnight can be determined by the following rule-of-thumb: the number of the flowering cluster plus 2%. So if you’re flowering on cluster 4 + 2% = 6% minimum decrease in WC% overnight. If the decrease is less than this please look to your start or stop times of irrigation and cross check these with the advised values in the reference table.
Although the shortest day of the year is just behind us the daily radiation sums are still low. On brighter days you will need to give enough water for growth. Please remember, in this phase there is a distinct difference between controlled generative growth and the creation of a weak crop, which you interpet as generative.

In the coming weeks you will clearly experience the superior functional performance of Grodan growing media with respect to EC control. The generative balance in the crop should be maintained by late start & early stop times and by steering toward a stable but structurally high substrate EC. To ensure EC stability in combination with a short irrigation day ensure the irrigation session size is 4.0 - 4.5% (ml/m²) of the substrate volume (l/m²). Again your GroSens system is the perfect tool to monitor how substrate EC is developing day to day.
To get an appreciation of the uniformity of WC% and EC between the slabs the GroSens handheld system or the Reader with a GroSens sensor in ‘kit mode’ is a perfect tool. Watch the video below on how to do this correctly.

| Bright day - Vegetative steering | Dark day - Generative steering | ||||||
| Start time | +2.0 hrs after sunrise | +3.0 hrs after sunrise | |||||
| Stop time | -2.0 hrs before sunset | -3.0 - 4.0 hrs before sunset | |||||
| Target day level WC | 60% (Top>40%) | 55 - 60% (Top>40%) | |||||
| Target decrease WC overnight | 6 - 8% | 8 - 10% | |||||
| Moment 1st drain | Before 12.00 hrs | After 12.00 hrs | |||||
| EC drip | 3.5 - 4.0 mS/cm | 3.8 - 4.2 mS/cm | |||||
| EC block | 5.0 - 7.0 mS/cm | 6.0 - 9.0 mS/cm | |||||
| 24 hr drain | 15 - 25% | 0 - 20% | |||||
| Irrigation volume | Start of phase: 250 - 350 ml/m² End of phase: 300 - 400 ml/m² | Start of phase: 250 - 400 ml/m² End of phase: 350 - 500 ml/m² | |||||
| ml/joule | Not applicable | Not applicable | |||||
| Night irrigation | No | No | |||||
The concept of Precision Growing combines variety, climate and irrigation strategies in an optimal way. In Phase 2 work on gradually reducing the day level WC% and increasing the growing media EC until the 4th cluster is in flower. This strategy will further enhance root penetration throughout the entire substrate volume. NG2.0 technology has allowed Grodan to increase the substrate height without loss of the slabs functional performance (uniformity of WC% and EC). The added benefit of Grodan Prestige 10 cm is an additional 25% rooting volume in the centre of the growing media (assuming like for like volumes versus 7.5 cm high slabs per m²). These roots will be more efficient than those in the bottom layer of the slab. Importantly towards the end of this phase you will require minimal irrigation volumes to stabilize and refresh the EC. Consequently “flushing” the growing media is not required, thereby you are able to facilitate maximum generative steering.
Target crop
Growth should remain constant and uniform. The 24 hrs temperature should be adjusted to the light levels to ensure optimum partitioning of available assimilates for plant and fruit growth.
Target root zone
Root quality and activity should be retained to ensure controlled and uniform re-growth of the crop from the harvest of the first clusters. The decrease of WC% during the night will provide a good indication for the level of plant activity during the day.
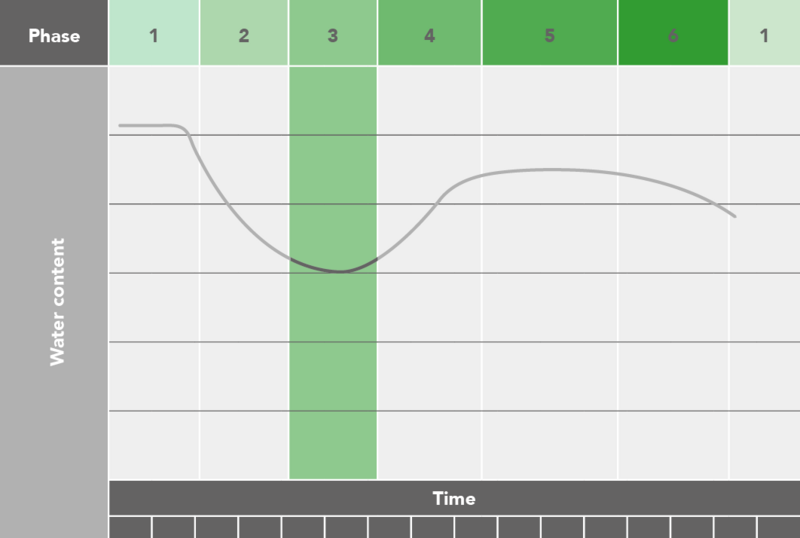
Start of phase
4th truss is flowering
End of phase
After first harvest
Objective phase
Avoid shocks in development by retaining the right balance in fruit load and growing power in the plant to ensure optimum cluster development. The combination of harvest of the first fruits and new fruit setting (as fruit load continues to increase) must be in line with assimilates supply which is variable and strongly depending on the weather.
The fourth or fifth cluster is now flowering. Fruit on the first and second clusters is increasing in size and irrigation is now required to level EC and raise the WC% of the growing media. But do not think that control over EC comes with “flushing” the slabs. This will result in a very vegetative crop reaction, especially with the extensive use of the climate screen.
Now is the time to ensure that your irrigation strategy is set up on the basis of the astronomical clock and radiation sum. The first irrigation should be given 80 - 100 J/cm² or no later than 3 hrs after sunrise. On darker days if the radiation sum is not met start with large irrigation volumes (4 - 6% of the growing media volume) aiming to realize drain about 2.5 - 3.0 hrs after the first irrigation. Large irrigation volumes during this period will also help limit the degree to which the maximum day level WC% is raised.
Set up the strategy so that the decrease in WC% overnight after a dark day is at least the same but preferably greater (i.e. 12%) than the decrease after a sunny day (i.e. 10%). irrigating too long on the dark days will create strong vegetative crops, stopping too soon on the sunny days will create weak generative crops.
Use the sunny days to refresh the nutrient solution in the slab. Do not lower the irrigation EC to lower the slab EC. Instead realize some extra drain.
| Bright day - Vegetative steering | Dark day - Generative steering | ||||||
| Start time | +1.0 - 2.0 hrs after sunrise 60 - 100 J/cm² or 150 W/m² | +3.0 - 4.0 hrs after sunrise. When WC falls 1.5 - 2.0% from sunrise | |||||
| Stop time | -1.0 - 2.0 hrs before sunset. Ideally leaving or 100 - 180 J/cm² and a light intensity threshold 200 - 250 W/m² to sunset | -3.0 - 4.0 hrs before sunset | |||||
| Target day level WC | 60% and increasing with light | 55% and increasing with light | |||||
| Target decrease WC overnight | 8% | 8 - 10% | |||||
| Moment 1st drain | 400 J/cm² or 600 W/m² | Less than 4 irrigations | |||||
| EC drip | 3.0 - 3.3 mS/cm | 3.5 - 3.8 mS/cm | |||||
| EC block | 4.0 - 5.0 mS/cm | 4.5 - 5.5 mS/cm | |||||
| 24 hr drain | 20 - 30% | 10 - 20% | |||||
| Irrigation volume | 300 - 400 ml/m² | 350 - 450 ml/m² | |||||
| ml/joule | Not applicable | Not applicable | |||||
| Night irrigation | Only if additional vegetative steering is required | No | |||||
The growth of new roots and root tips should be encouraged by adjusting the start and stop times of irrigation, especially on darker days. The irrigation and slab EC’s are important steering tools to maintain plant balance and fruit quality in this phase. The NG2.0 technology allows the irrigation EC to be maintained sufficiently high while the slab EC remains stable with minimal drain volumes. This makes it possible to start irrigation later and stop earlier especially on the darker days. Importantly it means that you do not have to “chase” the EC of the growing media by applying additional irrigation water and creating unnecessary and unwanted vegetative crop development.
Target crop
Prepare the crop for summer creating the right balance as the plant load and production continue to increase.
Target root zone
To support increasing transpiration levels the root zone environment needs to be prepared. The recommended WC% and EC levels for late spring and summer should now be realised.
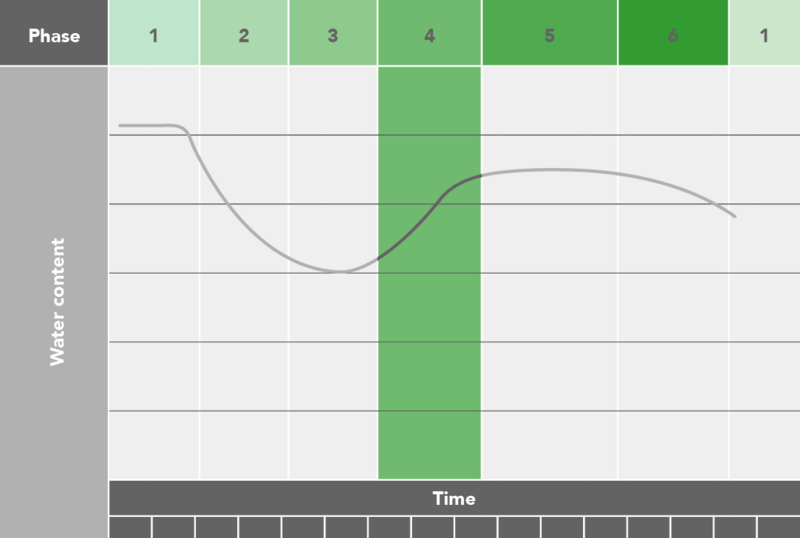
Start of phase
After first harvest
End of phase
Crop is getting into stable production
Objective phase
Realise controlled and uniform re-growth of the crop following the first harvests.
First harvests have now been taken and solar radiation is increasing rapidly towards the longest day.
From now on the irrigation strategy can become more structured. Remember there are 4 key irrigation stages during the day:
| Bright day - Vegetative steering | Dark day - Generative steering | ||||||
| Start time | +1.0 - 2.0 hrs after sunrise 60 - 100 J/cm² or 150 W/m² | +2.0 - 3.0 hrs after sunrise. When WC% falls 1.5 - 2.0% from sunrise | |||||
| Stop time | -1.0 - 2.0 hrs before sunset. Ideally leaving or 100 - 180 J/cm² and a light intensity threshold 200 - 250 W/m² to sunset | -3.0 - 4.0 hrs before sunset | |||||
| Target day level WC | 70 - 75% by week 22 | 70% by week 22 | |||||
| Target decrease WC overnight | 8% | 8 - 10% | |||||
| Moment 1st drain | 400 J/cm² or 600 W/m² or 4 - 6 irrigations | Less than 4 irrigations | |||||
| EC drip | 2.8 - 3.3 mS/cm | 3.0 - 3.5 mS/cm | |||||
| EC block | 3.8 - 4.5 mS/cm | 4.5 - 5.2 mS/cm | |||||
| 24 hr drain | 25 - 30% | 10 - 20% | |||||
| Irrigation volume | 250 - 350 ml/m² | 350 - 450 ml/m² | |||||
| ml/joule | 3.0 ml/J | Not applicable | |||||
| Night irrigation | Only if additional vegetative steering is required | No | |||||
The steering possibilities in Prestige 10 cm allow the day level WC% to be lowered as the outside climate becomes increasingly vegetative. A stable decrease in WC% during the night is most important. On the darker days targeting a larger decrease in WC% will help protect root quality and keep the right generative balance in the crop. The fast re-saturation properties of Prestige 10 cm will mean day level WC% can be easily increased to ensure enough water and nutrition is supplied to the heads of the crop on the bright days. Importantly when daily irrigation volumes are reduced as the day length shortens EC stability can be realized due to NG2.0 technology. Consequently “flushing” is not required as the substrate EC will remain sufficiently stable (but structurally higher) thereby facilitating maximum generative steering.
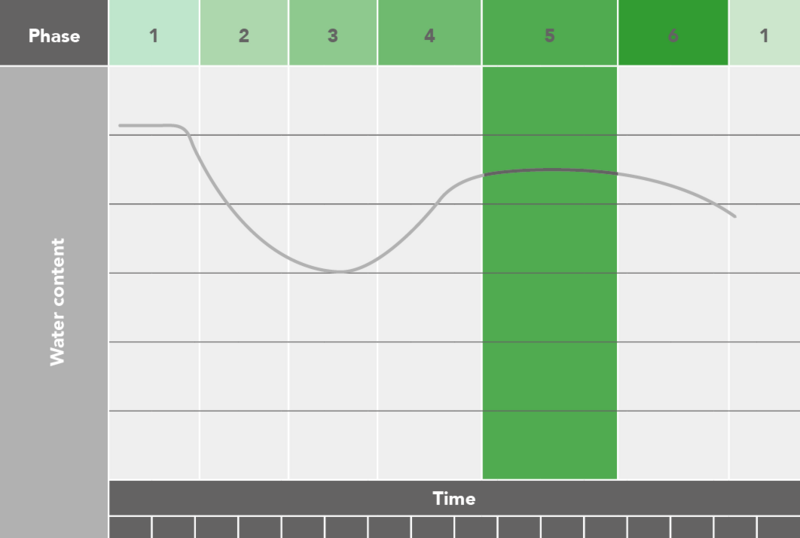
Target crop
Vegetative or generative steering will depend on the condition of the crop. The crop should remain strong to cope with large and extreme fluctuations in weather conditions. The set speed should match the harvest speed to maintain constant fruit load.
Target root zone
Water uptake should match the needs of the crop for maximum cooling potential to create a good climate inside the greenhouse. Good root penetration throughout the entire volume of the growing media realised in Phase 2 will help the crop to cope with
extreme weather conditions.
Start of phase
Crop is getting into stable production
End of phase
Head is taken out of the plant
Objhective phase
Maintain maximum plant vigour and production potential by keeping plant and root quality in excellent health.
Start and stop times should coincide with plant transpiration. It is best to remove the maximum rest time setting from the first irrigation period and use a light only setting (see advice tables). The second irrigation period should contain a maximum rest time setting. Likewise the final irrigation period of the day should be based on light only starts. In this way on a dark day no starts will be given and on a bright day the starts continue (see advice table) and a stable decrease in WC% will be maintained.
The irrigation EC should remain >3.0mS (especially with radiation <600W/m²). The good irrigation efficiency of the Grodan slabs means you do not have to chase the EC of the growing media and can therefore keep irrigation under control especially in periods of changeable weather. A light reduction EC setting can be used but watch that you do not make the range too reactive, respecting the planned stop conditions.
An increasing EC at midday will have consequences for the plant’s vigour and fruit quality (micro-cracking and blossom-end-rot if it is not controlled). In the morning start with larger irrigation volumes 4 - 5% of the volume of the growing media in order to get drain in time. In the afternoon shorter more frequent irrigations 3% of substrate volume will help keep slab WC% & EC stable and controlled.
The GroSens system is an excellent tool to assess if the irrigaiton strategy needs adjusting. The standard graphic on your climate computer should contain WC%, EC, radiation sum (J/cm²) and radiation intensity (W/m²). If scaled correctly it is very easy to see relationships between these data points and answer the following questions:
| Bright day - Vegetative steering | Dark day - Generative steering | ||||||
| Start time | +1.0 - 2.0 hrs after sunrise 60 - 100 J/cm² or 150 W/m² | +2.0 - 3.0 hrs after sunrise. When WC% falls 1.5 - 2.0% from sunrise | |||||
| Stop time | -1.0 - 2.0 hrs before sunset. Ideally leaving or 100 - 180 J/cm² and a light intensity threshold 200 - 250 W/m² to sunset | -3.0 - 4.0 hrs before sunset | |||||
| Target day level WC | 75 - 80% | 70 - 75% | |||||
| Target decrease WC overnight | 8% | 8 - 10% | |||||
| Moment 1st drain | 400 J/cm² or 600 W/m² or 4 - 6 irrigations | Less than 4 irrigations | |||||
| EC drip | 2.8 - 3.3 mS/cm | 3.0 - 3.3 mS/cm | |||||
| EC block | 3.5 - 4.5 mS/cm | 4.5 - 5.0 mS/cm | |||||
| 24 hr drain | 25 - 40% | 15 - 25% | |||||
| Irrigation volume | Morning: 300 - 400 ml/m² Afternoon: 250 - 350 ml/m² | 350 - 450 ml/m² | |||||
| ml/joule | 3.0 ml/J | 2.5 - 3.0 ml/J | |||||
| Night irrigation | Only if corrective actions are required delta WC >10% | No | |||||
The strong root system formed in previous phases should benefit the crop when transpiration is highest promoting strong growth and facilitating optimum production. With prestige 10 cm you have the benefits of an increased volume of growing media (+25%) in the middle of the slab which promotes plant vigour. The NG2.0 technology will allow you to refresh the slab solution easily ensuring fruit and plant quality is maintained. The good block / slab interaction from use of Plantop blocks in combination with Prestige 10 cm maintains a uniform WC% & EC over the entire column height of the growing media. Consequently you will observe new ‘pin’ roots emerging continually from the block and developing into the slab enhancing plant vigour and production.
The first drain on bright days should be achieved when outside light intensity reaches 600 W/m² or the light sum is 400 J/cm². This will ensure that the EC of the growing media is stabilised in time. On darker days you can use more generative steering to maintain the right balance, but only if the plant is strong enough. The irrigation efficiency of the Prestige 10 cm means you can easily refresh the EC of the growing media without excessive irrigation thereby safeguarding fruit and plant quality.
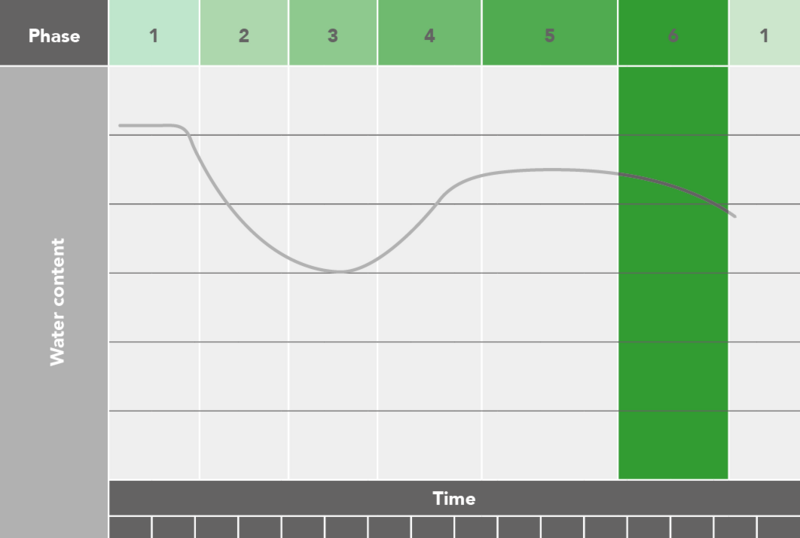
Target crop
Maintain strength and growing power of the plant and limit the ingress of disease in the crop as the light levels diminish towards final harvest.
Target root zone
Maintain a healthy and active root system and to keep the correct nutrient balance in the root zone. Ensure the irrigation strategy compensates for the rapidly changing transpiration levels. Maintain a stable and sufficient decrease WC% during night.
Start of phase
Head is taken out of the plant
End of phase
When final harvest has taken place
Objective phase
Keep the crop in a healthy condition and use the vigour to ensure production and quality is maintained right through to the last planned harvest date.
In order to keep the root system healthy good oxygen penetration is important. Therefore lower the irrigation frequency and the day level slab WC% will decrease slowly. To compensate for the lower irigation frequency increase the size of the irrigation volume per cylcle. Ensure the start and stop times coincide with the astronomical clock and gardually lower the day level slab WC%.
Pay attention to dark days with relatively high temperatures as the crop can evaporate more than the anticipated set radiation sum. On a sunny autumn day, the crop will only become active at +/- 100 J/cm². This is the moment for the 1st irrigation.
Often too much irrigation is given on dark days. The advice is to irrigate with minimum volumes on days >500 J/cm² and it is neither uncommon nor detrimental to the crop to achieve zero drain and the let the growing media EC increase. On days where the radiation sum exceeds 1000 J/cm² irrigation should be applied 2.5 to 3.0 times the radiation sum. Such days are appropriate for leveling slab EC between 11:00 – 13:00 hrs.
Stop irrigation on dark days up to 3.0 - 4.0 hours before sunset and target a steady decline in slab WC% overnight between 7 - 8%. Overall keep the irrigation EC >3.0 mS/cm especially when radiation <600 W/m² and consider the need for light reduction EC if these settings have been very reactive during phase 5.
| Bright day - Vegetative steering | Dark day - Generative steering | ||||||
| Start time | +1.5 - 2.5 hrs after sunrise 80 - 100 J/cm² or 200 W/m² | +2.5 - 3.5 hrs after sunrise. When WC falls 1.5 - 2.0% from sunrise | |||||
| Stop time | -2.0 - 3.0 hrs before sunset. Ideally leaving 150 J/cm² and light intensity threshold 200 - 250 W/m² to sunset | -3.0 - 5.0 hrs before sunset | |||||
| Target day level WC | 70 - 75 decreasing to 60 - 65% | 70% decreasing to 60%. Top layer of slab >35% | |||||
| Target decrease WC overnight | 8 - 10% | 10 - 12% | |||||
| Moment 1st drain | 400 J/cm² or 600 W/m² or 4-6 irrigations | Less than 4 irrigations | |||||
| EC drip | 3.0 - 3.3 mS/cm | 3.3 - 3.5 mS/cm | |||||
| EC block | 3.5 - 4.5 mS/cm | 4.5 - 6.0 mS/cm | |||||
| 24 hr drain | 25 - 30% | 10 - 25% | |||||
| Irrigation volume | Morning: 350 - 450 ml/m² Afternoon: 300 - 400 ml/m² | 400 - 500 ml/m² | |||||
| ml/joule | 2.8 - 3.2 ml/J | 2.5 - 3.0 ml/J | |||||
| Night irrigation | No | No | |||||
The steering possibilities in Prestige 10 cm allow the day level WC% to be lowered as the outside climate becomes increasingly vegetative. A stable decrease in WC% during the night is most important. On the darker days targeting a larger decrease in WC% will help protect root quality and keep the right generative balance in the crop. The fast re-saturation properties of Prestige 10 cm will mean day level WC% can be easily increased to ensure enough water and nutrition is supplied to the heads of the crop on the bright days. Importantly when daily irrigation volumes are reduced as the day length shortens EC stability can be realized due to NG2.0 technology. Consequently “flushing” is not required as the substrate EC will remain sufficiently stable (but structurally higher) thereby facilitating maximum generative steering.
We are a global leader in the supply of innovative stone wool substrate solutions for the professional horticultural based on Precision Growing principles.